Drywall Repair Guide
Most drywall damage is minor and easy to repair. In fact, almost anyone can patch drywall with the right tools and a little patience. The most common issues in Bridgewater, NJ include dents, nail and screw holes, cracks, and popped nail heads. These types of repairs are straightforward and can usually be completed quickly. Homeowners looking for professional drywall repair in Bridgewater, NJ can use this guide to understand the process before hiring a local drywall contractor.
How to Fix Small Holes and Dents in Drywall
Small dents and tiny holes are among the easiest drywall repairs to make.
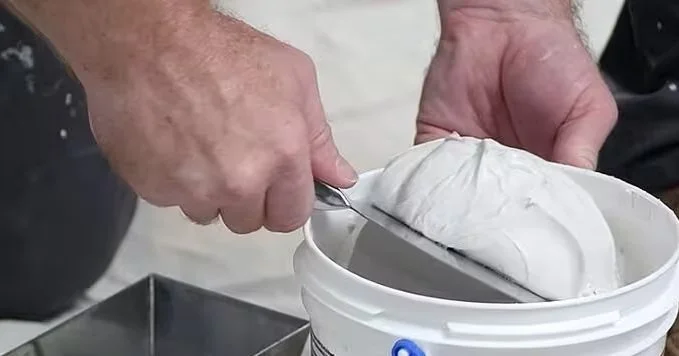
Fill dents and small holes with lightweight spackle using your finger or a putty knife.
Make sure the spackle completely fills the area and is level with the surrounding wall.
Allow the spackle to dry for 15 to 30 minutes, or according to the manufacturer’s instructions.
Once dry, sand the area smooth using fine-grit sandpaper.
Brush away dust and touch up the paint.
How to Repair Drywall Cracks
Cracks in drywall require a little more preparation to ensure a lasting repair.
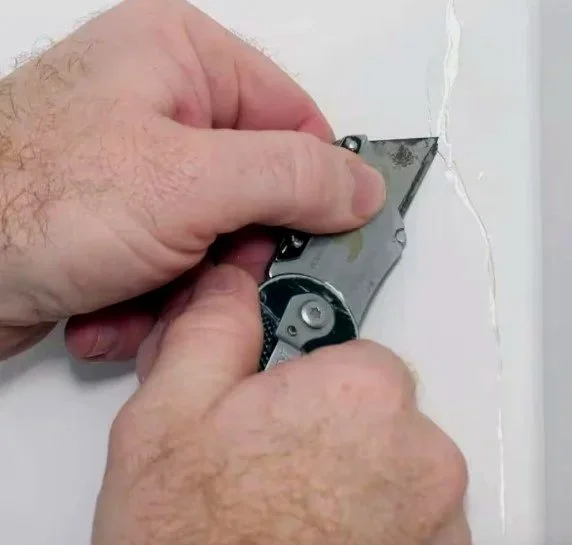
Widen the crack slightly using a utility knife, then brush away any dust or debris.
Fill the widened crack with lightweight spackle using a putty knife.
Apply a thin coat of spackle over the entire area and smooth it evenly.
Allow the spackle to dry for 15 to 30 minutes, following the manufacturer’s recommendations.
Sand the area smooth once dry.
Remove dust and touch up the paint.
If the crack is wider than 1/2 inch:
Cover the crack with self-adhesive fiberglass drywall tape.
Spread joint compound over the tape using a putty knife.
Allow the compound to dry completely, then sand it smooth.
Apply a second thin coat if needed. Once dry, sand again.
Touch up the wall paint.
How to Fix a Popped Nail Head
A popped nail head occurs when a nail loosens from the wall stud. To repair this type of drywall damage:
Reattach the drywall to the stud by driving a drywall screw 1 to 2 inches above the popped nail.
Sink the screw head just below the surface of the drywall.
Carefully hammer the popped nail back into the wall using a rubber mallet.
Cover both the nail head and the screw with spackle.
Allow the spackle to dry, then sand it smooth.
Touch up the paint.
Repairing Small Drywall Holes With a Drywall Repair Kit
Drywall repair kits are ideal for fixing small holes. Most kits include the necessary tools and a 4-inch by 4-inch self-adhesive mesh patch, though larger patches are also available.
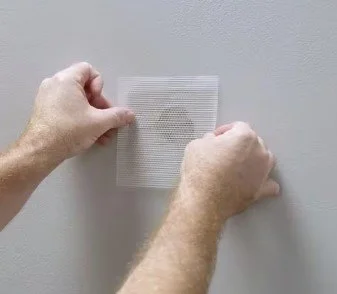
Cover the hole with a properly sized self-adhesive mesh patch.
Use a putty knife to spread the included spackle or lightweight joint compound over the patch.
Apply the compound generously in a crisscross pattern.
Feather the edges so the compound blends smoothly into the surrounding wall.
Allow the compound to dry according to the manufacturer’s instructions, which may take up to 24 hours.
Apply a second coat if needed to fully cover the patch.
Once dry, sand the area smooth.
Touch up the wall paint.
Tip: If you have multiple patches on one wall or if the repairs stand out after painting, repainting the entire wall will give the best results.
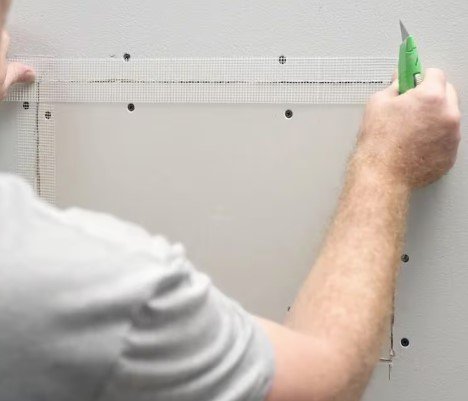
How to Repair Large Holes in Drywall (Over 4 Inches)
Repairing drywall holes larger than 4 inches requires cutting into the wall and installing a new piece of drywall. Before beginning, locate electrical wires and utilities using a stud finder.
Safety Tip: Turn off the main power before cutting into the wall.
Preparing the Wall
Use a carpenter’s square and pencil or marker to draw straight lines at least 1 inch above and below the damaged area.
Locate the nearest studs on either side of the hole using a stud finder and mark them.
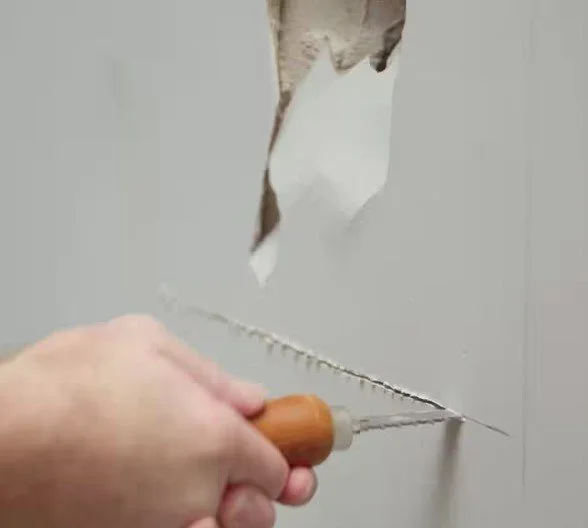
Cut along the marked lines with a drywall saw until you reach the studs.
Measure and mark 3/4 inch into each stud to locate the center.
Score these lines with a utility knife.
Continue cutting carefully along the lines, making several passes with increasing depth.
Remove the damaged section of drywall.
Safety Tip: Always cut away from your body.
Installing Support Pieces
Support pieces help prevent cracking and provide stability for the patch.
Cut supports from scrap lumber or 3/4-inch plywood.
Each support should be 2 to 4 inches longer than the height of the patch.
Position the supports vertically behind the opening.
Secure them with drywall screws, sinking the screw heads slightly below the drywall surface.
Creating the Drywall Patch
Trace the removed drywall piece onto a new sheet of drywall.
Cut the patch using a utility knife and carpenter’s square.
Test fit the patch to ensure it fits securely without forcing it into place.
Installing the Patch
Place drywall screws at least 1 inch from the edges to prevent crumbling.
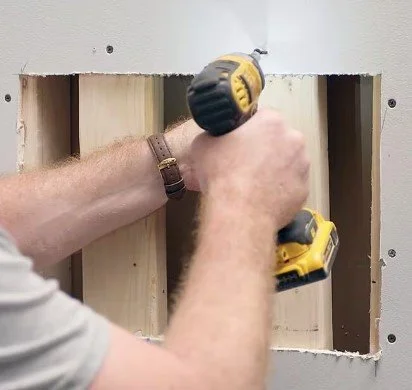
Secure the patch to the wall studs and support pieces using a drill.
Sink the screw heads slightly below the surface of the drywall.
Finishing the Repair
Apply self-adhesive fiberglass drywall tape around the edges of the patch, centering it over the seams.
Use a 6-inch drywall knife to spread joint compound over the patch and taped seams.
Allow the compound to dry overnight, then sand smooth.
Apply a second coat and let it dry.
For a perfectly smooth finish, apply a third coat using a 12-inch drywall knife.
Allow the final coat to dry overnight before sanding.
Wipe the area with a tack cloth and paint the wall.
Need Professional Drywall Repair in Bridgewater, NJ?
While many drywall issues can be repaired DIY, larger holes, texture matching, and seamless paint blending are best handled by a professional. Our local drywall repair team proudly serves homeowners in Bridgewater and surrounding areas with fast, clean, and reliable service.
👉 Contact us today for a free estimate.